
After a long time away (and the year of all years), I’m happy to reenter this space to reflect a bit on some of the teaching tips and tricks that have gotten me through this past year, and especially on those that will continue to be useful after we’ve returned back to in-person teaching (or some type of hybrid teaching).
One of my favorite tools I’ve adopted this year is Google’s Jamboard. Jamboard provides a collaborative digital whiteboard platform, with tools to add sticky notes, text, images, and free-form drawing. It’s free to use, and just requires a Google account to set up.
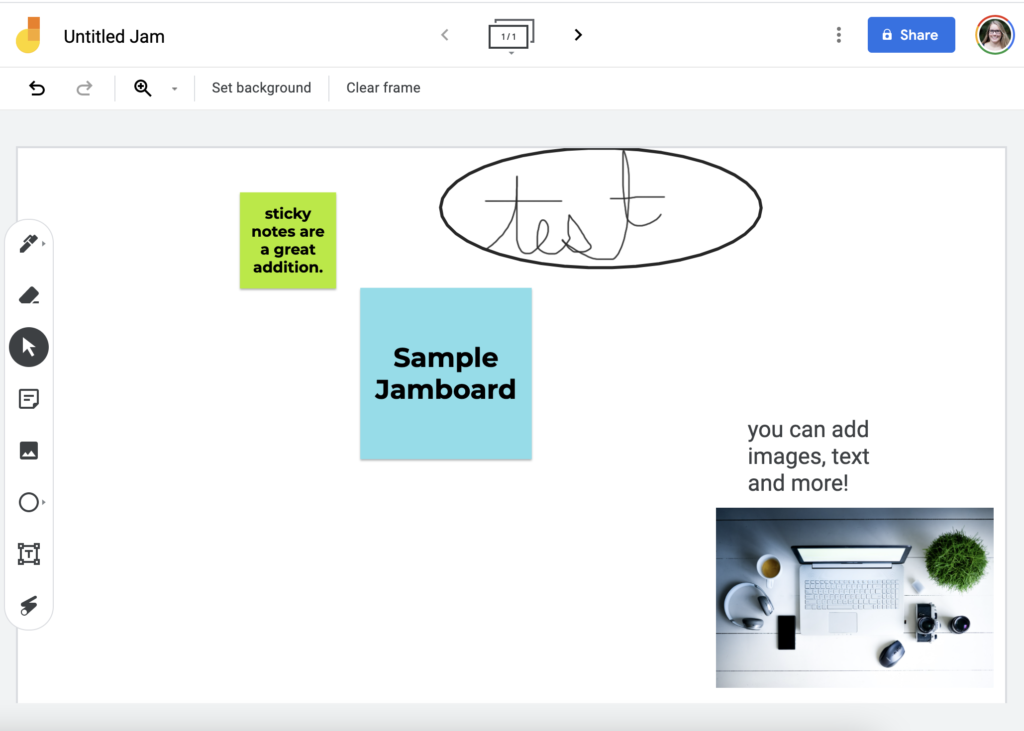
In the face-to-face classroom, I loved using post-it notes on walls and tables, mind-mapping on paper and whiteboards, and other strategies to help students collaboratively visualize and organize ideas. Jamboard provided a great space to adapt this practice to a virtual, synchronous teaching environment.
Using Jamboard in Small Groups.
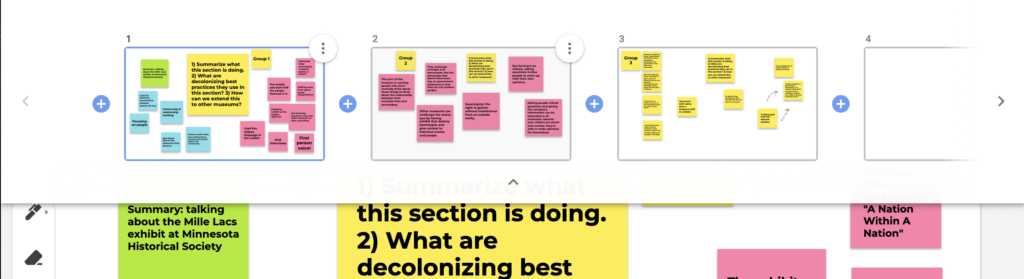
I love using Breakout Rooms in Zoom to divide up students, but I hate jumping in on conversations by bouncing from room to room. Instead I assigned each group a “frame” on Jamboard and a specific task to work on, and I could track their progress from the main room, without interrupting them. It was surprisingly insightful in seeing a group’s progress (and when that progress stalled out), and I learned a lot that I couldn’t always track in the face-to-face classroom.
To do this well, I recommend making each group a “frame” on the Jamboard and labeling it “Group 1,” “Group 2,” etc. in advance. Let each group know their assigned frame before sending them to breakout rooms (Names X, Y, and Z are group 1 and will use the first frame). Be sure to set the document to being editable and share the link BEFORE you send students to break out rooms (Can you tell what mistakes I’ve made in the past?!) I like also adding a prompt to the page to help keep the groups focused and provide visual reminders of the task I’ve assigned.

Two ways to do this: Click on the “frame” navigation button (circled in red above), which pops up thumbnails of each frame. If you place the prompt and group label on the first slide, you can click the three dots to duplicate the slide (and then you just need to update the group numbers on each slide). Alternately, you can also use CTRL (or Command) + D to duplicate a frame.
An additional thing I loved about using Jamboards is I could include the links to completed boards on our canvas page so that students could reference them for notes.
Ideas for Jamboard topics:
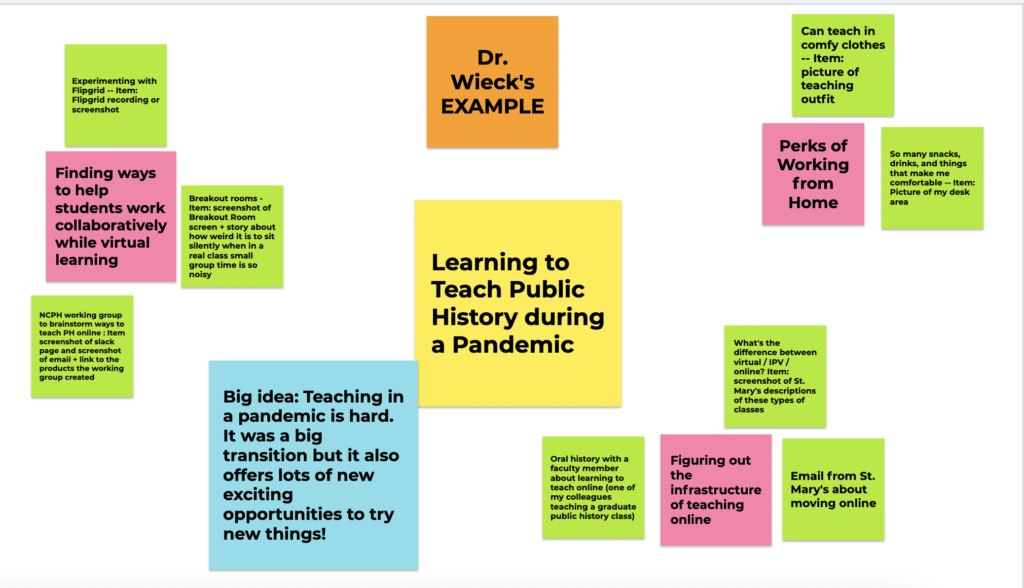
While the example above provides a more sustained example of how students could Jigsaw a text, Jamboards can be used for tasks both quick and more engaged. Here are a few ways I’ve used it.
- Create one frame for the class (works with a smaller class) to brainstorm ideas about a topic or answer a question about a class reading. For example, “what is oral history and why does it matter?” Or divide the frame in half with a line and ask students to compare examples of two different terms (e.g. archives vs. digital archives)
- Assign one frame per student or ask them to open their own jamboard and consider their own position on a topic. In our case, students investigated their positionality to determine how that impacted their work as a public historian. Students made sticky notes referencing their identity, their biases, and the things that were important to them. (In this case, they chose what they wanted to share with the class and whether they wanted to share their screens or not).
- Assign one frame per group and ask students to plan a collaborative project. This had the added benefits that A) All student plans were in one place which made it easy for me to keep track of, and B) Students could see each other’s plans to get ideas for their projects. In this case, I combined graduate and undergraduate students into one Jamboard so they could draw inspiration from each other.
Hope you enjoy giving this a try! Share your favorite Jamboard strategies in the comments below!